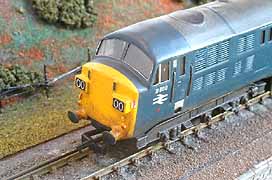
North British "Warship" - D600 Active


This etched nickel-silver Worsley Works kit is very basic, what you see in the pic below is all you get. Allen of Worsley Works describes his products as "scratch aids", so motorisation and fittings always require a certain amount of initiative, but I do have one or two ideas....

1. The kit as it comes out
of the pack:
2. Firstly, let's consider an example of the real thing
3. The nose just doesn't look right, the buffer area is wrong
4. But nothing that a splodge of solder, pliers and filing can't cure
5. Chassis motorised with two Bullant motor bogies. All wheels driven and all-wheel pickup. The parts of the chassis etching that sit under the cab at each end have been cut off and soldered into the body itself. This stiffens the nose area and makes fitting/removing the body easier.
6. Although there is still a lot of fitting-out and all the painting to do, D600 Active has now left the slipway...
The oval buffers and shank cowlings come courtesty of a donor Tri-ang class 31 A1A. I didn't like the etched roof vents included in the kit, they look too coarse. Therefore vents from the 3SMR "Diesel Details" brass stamping sheet have been used instead.
7. Although still a bit on the light side, she runs smoothly with a pleasing dual motor tone.
8. Without castings, bogie sideframes were always going to be a challenge. Scratchbuilding was the only answer; the main shape built from a layers of shaped sheet plastikard sections, microstrip for the beading, and the axle covers and springs cut from scrap BTTB diesel bogie sideframes and very labouriously filed to shape.

9. The sideframes have now been glued to the Bullant bogies using Araldite and a framework built up around them from Plastikard to give both rigidity and a mounting for the new style Hornby OO couplings; both smaller and therefore less obtrusive, as well as backwards-compatible with, the original Tri-ang couplings on the majority of my stock.

10. The bogies are now wired and installed. A small 2-pin plug and socket has been fitted to connect the bogie wiring (shown disconnected in the photo) to make them easier to fit/refit if necessary in future. Headcode boxes were not supplied in the kit and have been scratchbuilt from plastikard.
11. The chassis has been ballasted with 55g of lead wheel-balancing weights
between the battery box faces; the lowest centre of gravity possible. Proving
trials on the layout have been very satisfactory, respectable tractive effort
and constant slow-running speeds with a very smooth standing start.
I think I will be using Bullants more often in the future...
12. Active will be painted in the full BR corporate blue livery, the only member of the class to receive it before withdrawal in 1968, and therefore one of the first examples of a corporate blue-liveried diesel loco reaching the scrapyard. She languished in a sorry state in Barry scrapyard alongside the steam locos she helped to displace, before being cut in 1980.

13. With the body having received 2 coats of Railmatch aerosol BR blue and the nose ends having several coats of Phoenix BR warning yellow, the roof panels are masked off for a coat of grey.

14. Final detailing is nearly complete; waterslide transfers from Cambridge Custom Transfers (loco numbering for 3mm scale), Fox (2mm scale BR arrows), 3SMR (route-availability red spot) and 3mm Society (OHLE warning flashes). Marker lights are from plastikard rod and the handrails from the previously-violated Triang class 31. A last topcoat of varnish, window glazing, headcodes, nameplate and some weathering still to go.

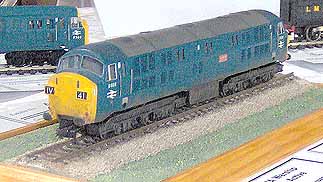
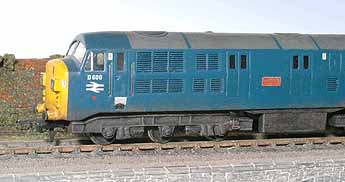
15. The completed loco in the Modern Image competition at the 3mm Society AGM May 2007 - wins Second Prize.

Plus two pictures also taken at the AGM by Geoff Helliwell

Back to TT modelling