BR Class 47 "North Star" & "Colossus"
3SMR etched brass & whitemetal kit

|
May 2009 This project started completely back to front; rummaging through a bits box on the Society Secondhand Trading stand at one of the 3mm Society events a fair few years ago I came across two sets of 3mm scale nameplates for BR class 47 diesels: D1661 North Star and D1672 Colossus.
One impulse purchase costing mere pennies later, there is now just the little matter of finding two locos to actually fit them to... |
|
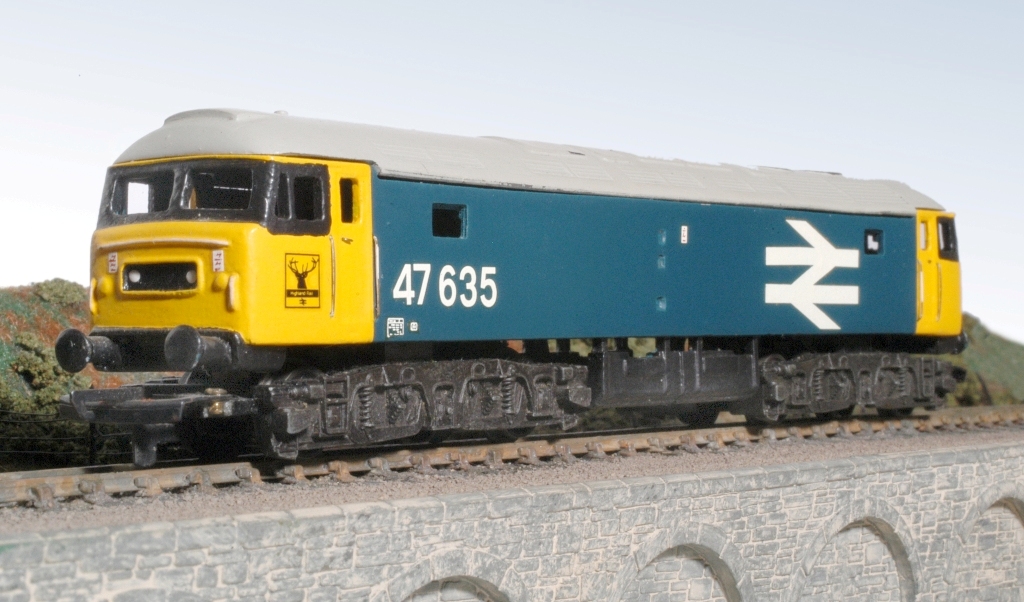
At the time of my nameplate purchase the mainstream production in China of a Ready-To-Run TT class 47 was still being mooted, but despite apparently attracting seemingly serious financial backing from an individual investor, unfortunately this scheme never progressed, so kit building would be the only answer.
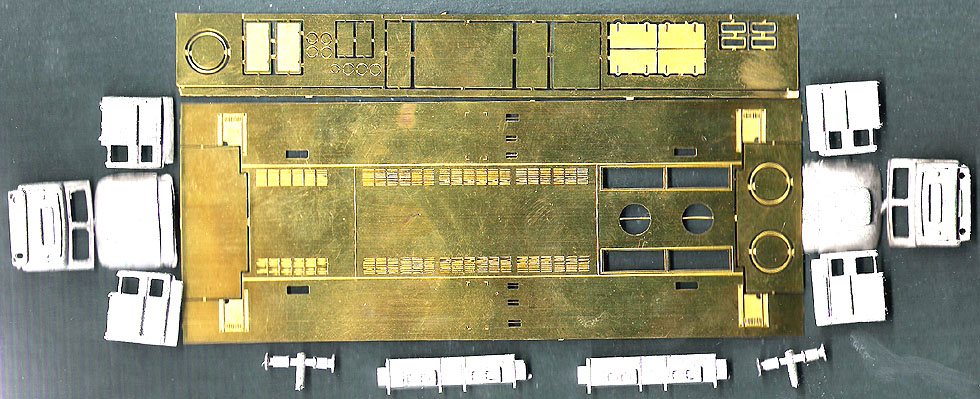
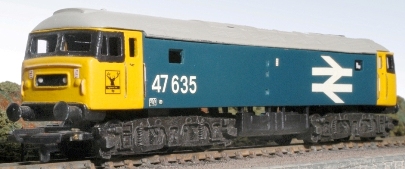
BEC produced a whitemetal class 47 kit (image at right is of an example built by Bruce Smetham) back in the 1960s, but although they still turn up on eBay from time to time, 3SMR have now deleted the kit from their range as the original 1960s era moulds have deteriorated to the point where they are usable only with difficulty and it must be said that the general quality of the castings is particularly rough when compared to modern resin casting standards.
(L&J models produced a 3mm Class 47 cast resin body for a while, you never see them now and it's probably best like that - they were not very good and were not a commercial success.)
|
|

|
3SMR do however have a replacement 47 kit in their range, a whitemetal and etched-brass hybrid kit that uses castings from the afore-mentioned BEC kit for the cab fronts, roofs and sides and an etched brass sheet for the body, side doors, roof panels etc...
So is it a big step forward from the old BEC kit? For me the problem is still with those cast whitemetal cab ends, as mentioned above they are a bit dodgy - and exactly these components are vital to getting the right class 47 look and feel.
|
|
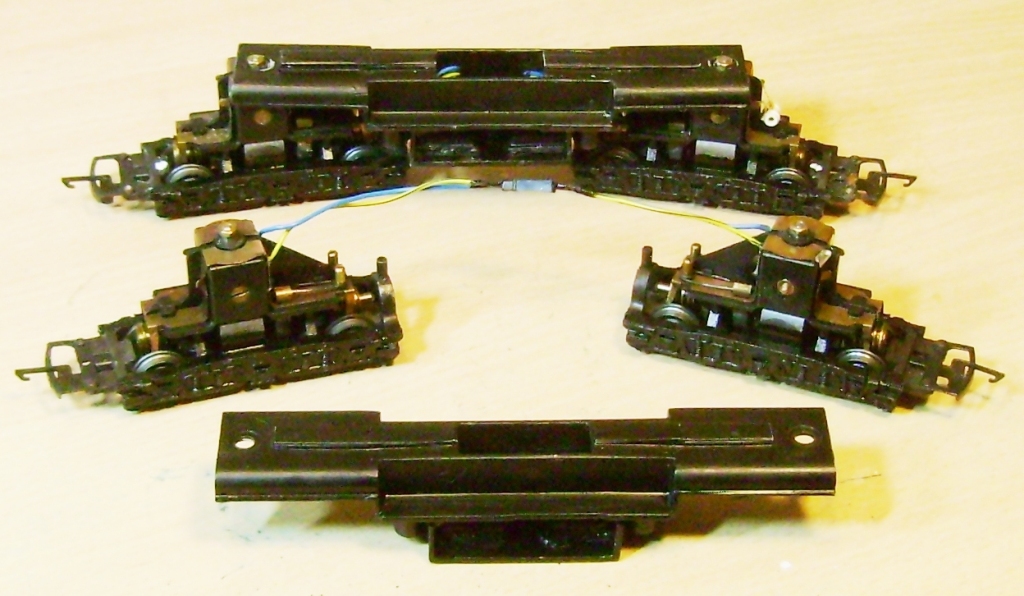
As with all 3mm scale diesel body kits this is a body-only kit, so the first thing I need to do is come up with a solution for building a motorised chassis - the "guts" of the loco.
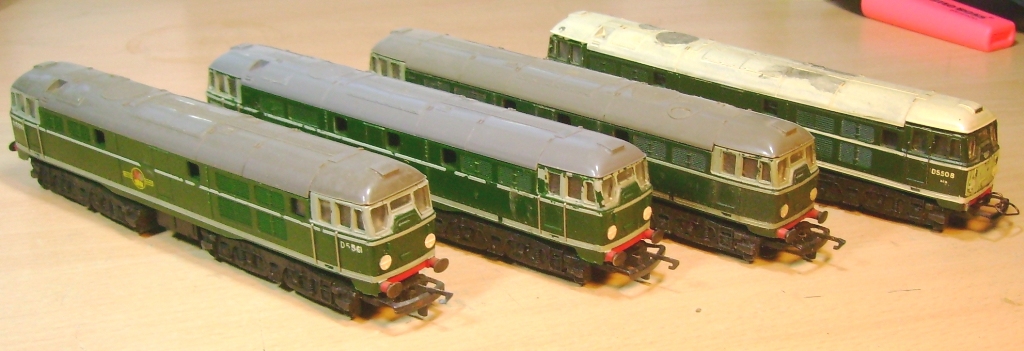
Given that the 47 is a Co-Co wheel arrangement and given that the original Tri-Ang motor bogie in my opinion looks acceptable (purists may beg to differ), I am going to go with a dual power-bogie design (for maximum tractive effort) that will therefore require the slaughter of 4 Tri-Ang class 31 innocents:
|
|
|
Collectors of standard Tri-Ang products are probably aghast at the wanton destruction of these four fine "collectors items" and with each loco costing around £20-£25 its not exactly a cheap solution, but I still think it's competitive if you take it in comparison with the cost of dual-powering using Bullant motor bogies. (Like I did on my
NBL diesel-hydraulic "Warship")
Putting razorsaw and the remains of the dismembered corpses to one side we are left with the following harvested organs; four bogie mounting housings and the actual motor bogies themselves. Despite all being at least 40 years old now, Tri-Ang motor bogies have the advantages of being very reliable, virtually indestructible and a wide range of spares is still available through the 3mm Society. |
|
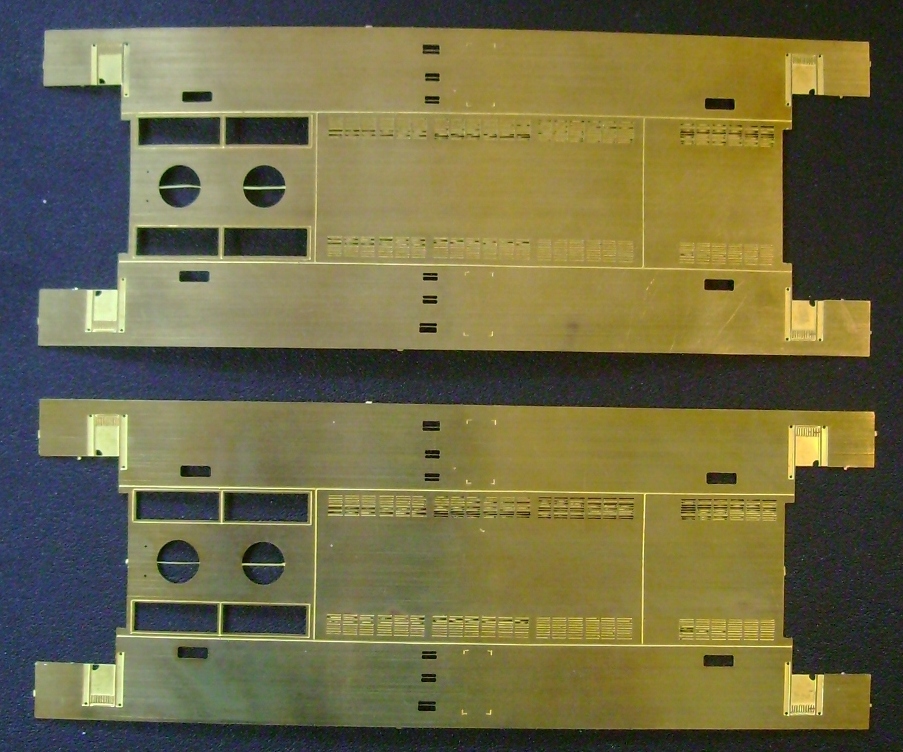
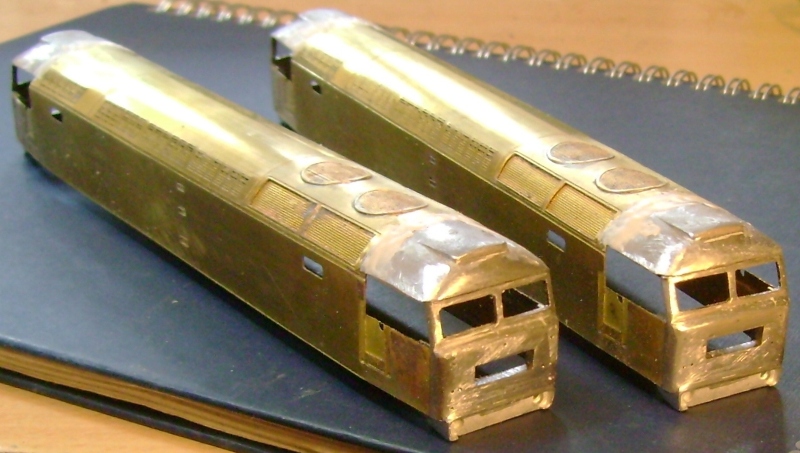
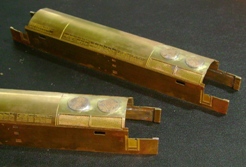
Moving now to the bodies we start with two flat-pack sheets of etched brass.
Q. Why did the class 47 kit cross the road? A. To see his flat mate
Taking on the metalworking tasks of shaping and soldering sheet brass is probably the biggest psychological challenge that a newcomer to 3mm scale needs to overcome if (like me) they have not modelled extensively in other scales before or are only familiar with plastic kit building. So together with soldering these are usually the two objections I hear given as an excuse against having a go and making a start in 3mm kit building (either steam or diesel). But actually it's not that hard and like with anything in life it can be learnt with a bit of patience and perseverance.
|

|
|
The class 47 is perhaps a good kit for a beginner as it is a relatively easy body shape to form as the sides are simple flat slabs with no complex curves or tumblehomes and the roof is a straightforward arc and not elliptical (like the class 73 or coach roofs).
The etching is also provided with a convenient half-thickness etched swage line along the cantrail, making folding easy.
The sheet is placed along the edge of a wooden block and lined up against the inside of the cantrail line. The sides are then folded down with gentle pressure from the fingertips to an angle of about 45 degrees.
|
|
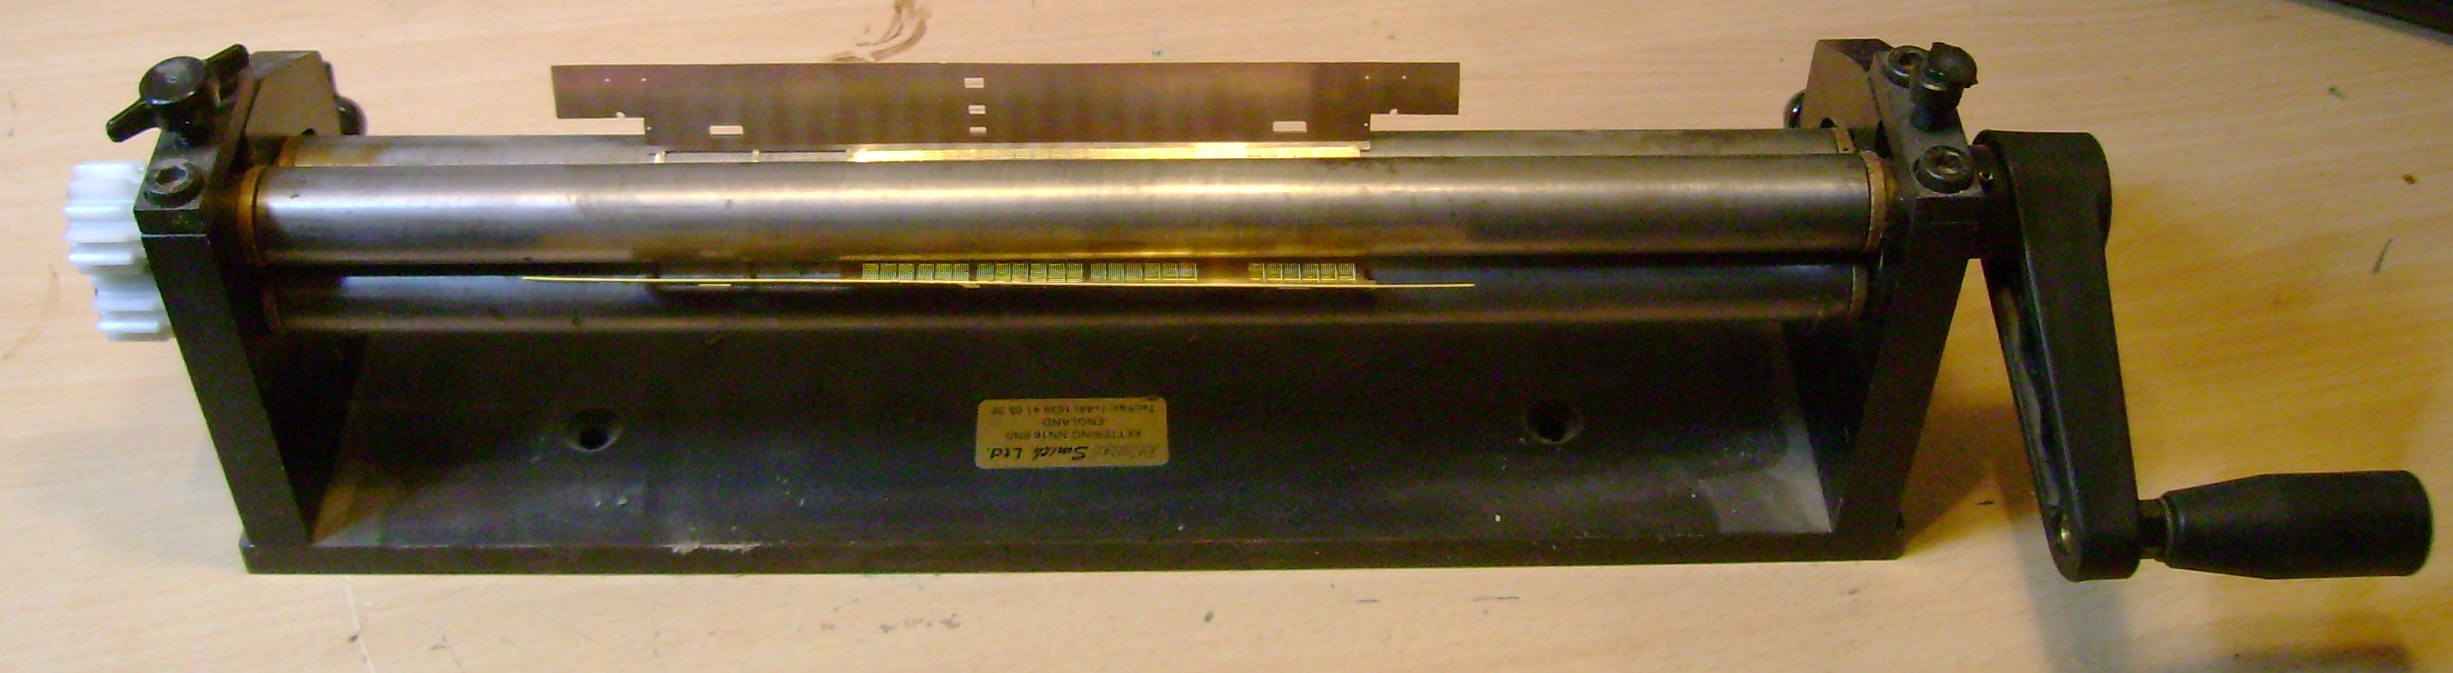
The next stage is to place the folded sheets in the Metalsmith rolling bars and roll back and forth up to the cantrail line on each side to form the roof curve.
Rolling bars are very much a question of individual taste. I know some people who are able to roll perfectly cylindrical parallel boilers using nothing more than a pencil on a pad of old carpet placed on their thigh, but that takes years of practice and given my early timid fumblings in 3mm I felt much more secure using a tool that virtually gurantees a good result, even if it is very expensive and may only get used on one or two occasions a year. www.metalsmith.co.uk
|

|
|
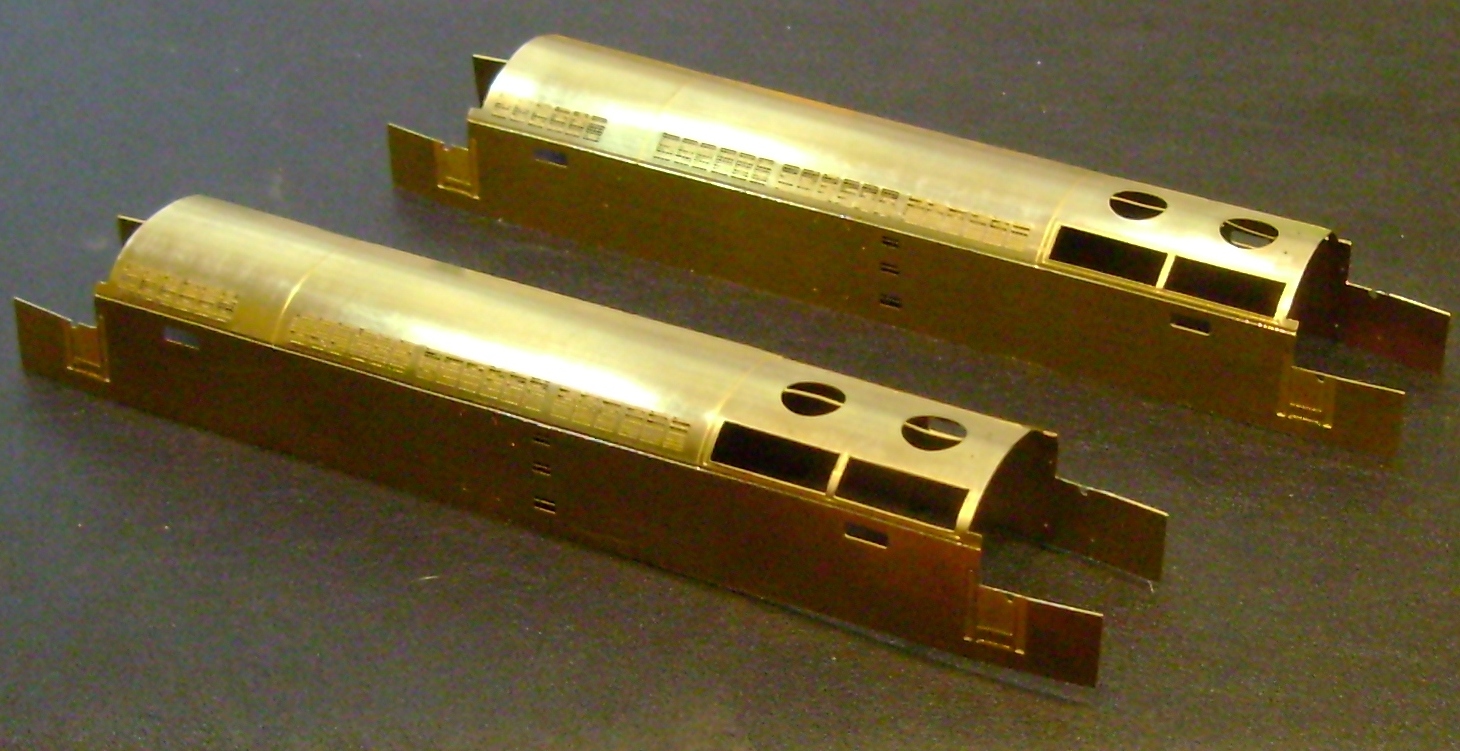
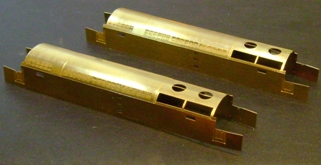
Now that the basic form is folded and rolled I have concerns that the gauge of the brass sheet may be a bit thin and therefore won't stand up to handling once the loco is complete as the absence of a tumblehome means there is no additional stiffening along the body side bottom edge.
So the next step is going to be the addition of some reinforcing brass strip soldered along the inside bottom edges and the fitting of the cab roofs and fronts so that I have clear dimensions to work with when constructing the chassis.
|
|
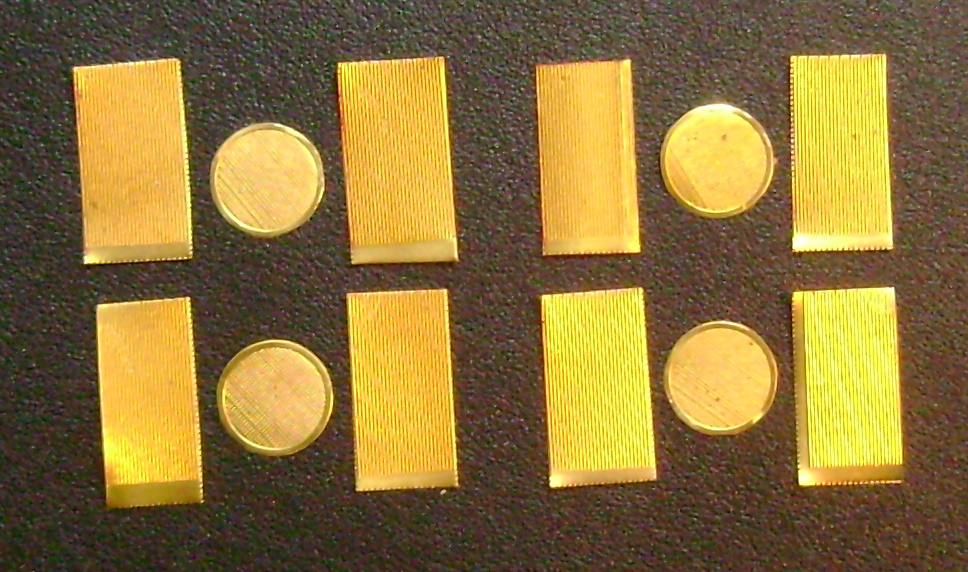
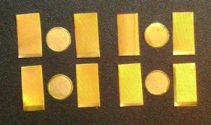
At this stage of the process, having taken a second look at the parts included in the kit, it suddenly occurs to me that there is a glaring omission; there are no grilles or vents provided for all those rather large gaping holes in the roof where the fans and the Serck radiator louvres live. A quick delve into my odds n sods box turns up some leftover items from the 3SMR Diesel Details pressed brass sheet that will do just fine.
|
|
The reinforcing strips, grilles and vents are in place and locating strips have been added to the ends of the cab sides.
The reason for this is that the whitemetal cab end castings were originally designed to fit the BEC whitemetal body which is considerably thicker than brass sheet, so all the locating lugs now sit too far back. Soldering strips of brass to the inside of the etch brings it up to the same thickness as the original BEC whitemetal casting so the end castings should sit comfortably in place or at least thats the theory
|
|

|
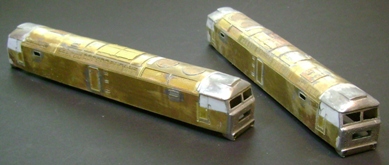
Now with the cab ends and roofs araldited in place I think they are starting to look a bit more like class 47s.
It looked like the rake of the front windscreen pillars was far too acute, despite the roofs being lined up against the brass etch they appeared to be raked too far back, so a 1.5 mm wide plastic strip was added to the rear edge of the roof moulding to bring them forward to reduce the angle of slant on the windscreen. Next problem was the end nose panels that were vertical when they should be slightly slanted back. They also needed all the cast detail removing because its far too coarse, so all in all the nose-ends received a fair savaging from a heavy duty file.
|
|
The raw construction is now complete with the soldered body window beading, roof panel and hatch details in place. I really didnt like the original cast whitemetal cab sides provided in the kit, they would have involved a huge amount of cutting and filing to make them fit, so on balance I decided that making my own from scratch was probably easier.
A backing piece was cut from plastikard and then a second layer of different thickness plastikard was added to give the continuation of the door outline and hand rail recess from the etched sheet. This assembly was then araldited in place and the window apertures will then be drilled and filed out at a later date.
|
|

|
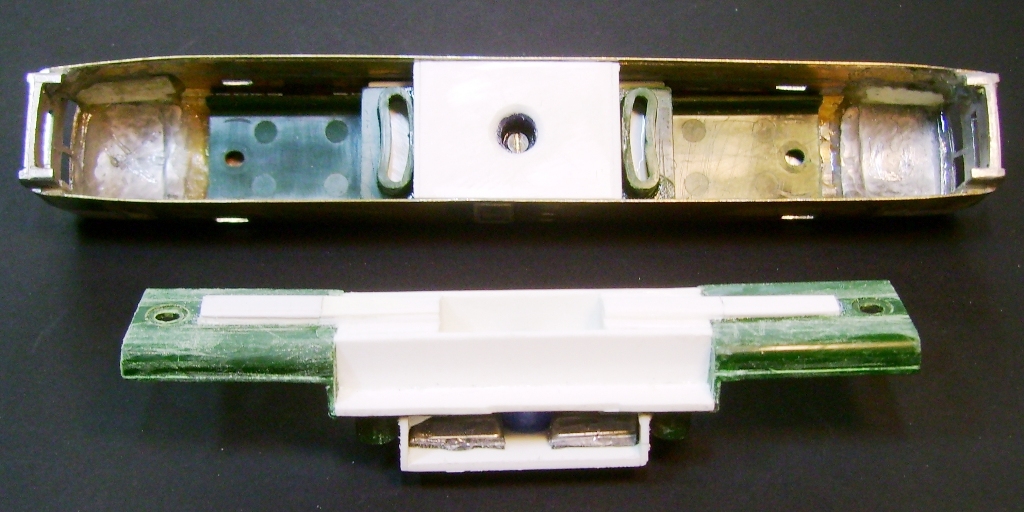
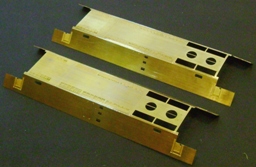
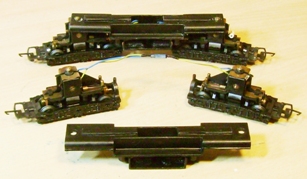
Turning to the chassis now, the green plastic bogie housings cut from the Tri-Ang class 31 donors have been incorporated into a box structure built from plastikard, weighted with 20g of lead weight and with a shaft through the middle for a brass screw that fits into a socket that has been stuck inside the roof, keeping the chassis firmly mounted up against the inside of the body.
|
|

|
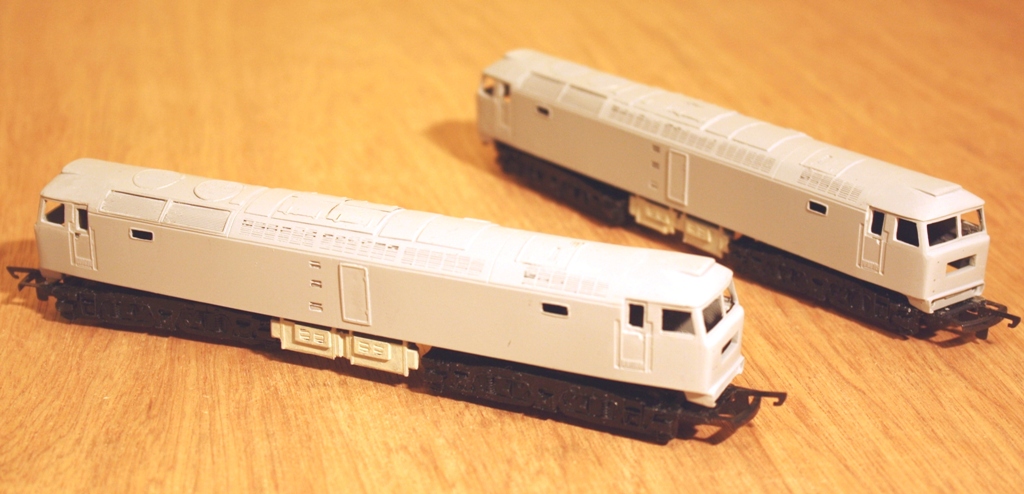
A coat of grey primer (Halfords acrylic aerosol) has been sprayed which helps to highlight imperfections in the soldering or filling, showing gaps, lumps or scratches that can then be filled with modelling putty and sanded down with 1,000 grade emery paper. It also helps to highlight that the cab fronts still need filing down to get more of an angle on the rake.
There are now several iterations of filling, sanding, a thin coat of grey primer and then yet more sanding. Gradually after several repeats even the worst scratches, dents and imperfections start to fade away. Eventually I usually get to the point where my own boredom with the process outweighs the perceived improvement to be gained by yet another iteration, and so it's time to start thinking about the livery scheme.
|
|
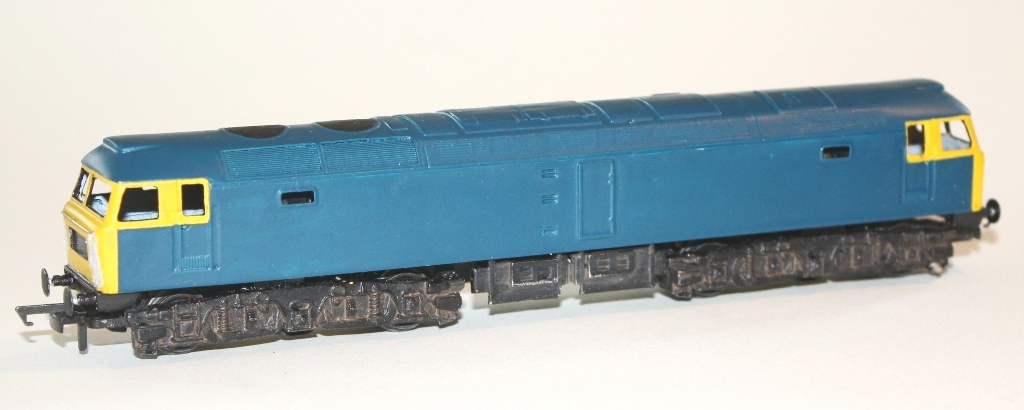
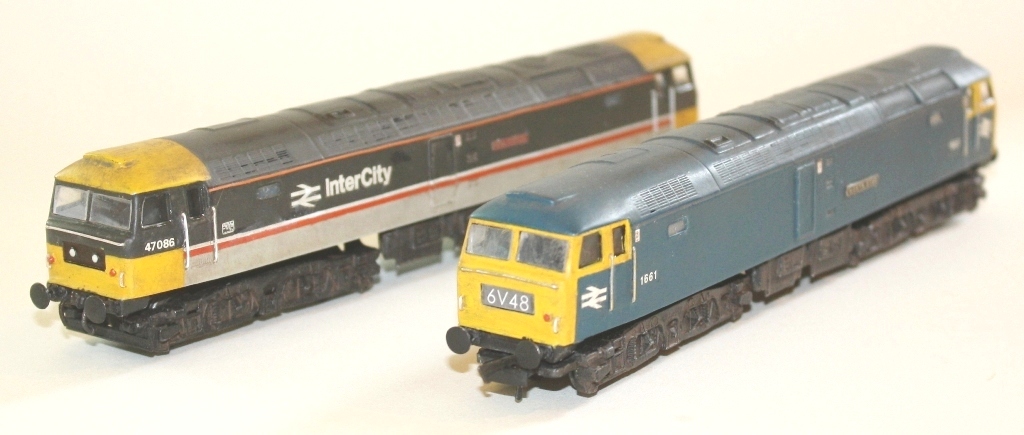
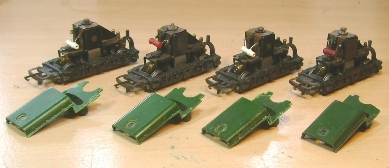
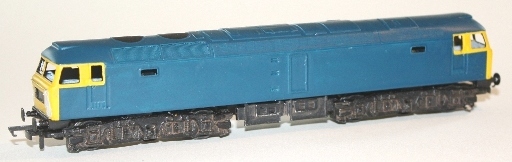
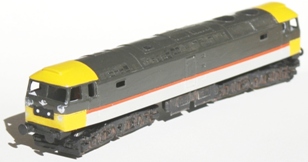
North Star is going to be finished in the early BR blue pre-TOPS livery with BR arrows at each end on the cab sides and the original number 1661 without the D prefix, which would place it roughly in the period between 1968 and 1971.
The slight issue with this is that only Brush-built locos D1953-61 ever carried this livery variation on delivery from the factory - North Star was built by BR at Crewe and was delivered new in two-tone green, but as this is my favourite class 47 BR blue livery variation I wait to see how many times this will be pointed out in future
;-)
|
|
|
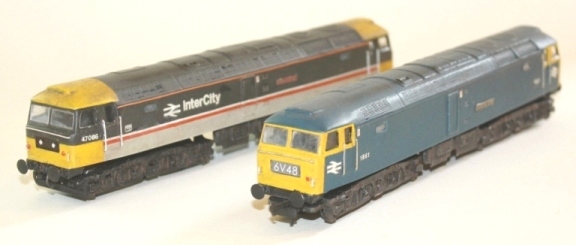
Colossus will be in the original BR InterCity Executive livery as first applied in 1984 - I think this really suited the 47s and is a visually appealing and interesting livery, but once again 47 086 never actually carried this particular livery in real life.
The paintwork is built up of successive layers starting with the lightest colour and then moving down the spectrum to the darkest. Masking tape is applied to ensure straight and even lines between the colours. So light grey goes first, then the yellow cab-ends, then the red stripe before the sides and yellow roof panels are masked up and the final dark grey coat is applied.
|
The finishing touches to both locos then in sequence consist of wire handrails, 3mm Society transfers followed by a spray coat of matt varnish, side window glazing is made from clear-drying PVA glue and the cab windscreens are individually cut and filed to shape from strips of Perspex. Route codes on North Star are printed from the PC (11 point Century Gothic font) and lastly theres been some weathering with a wash of dilute dark grey, track colour and oily black for exhaust streaks.
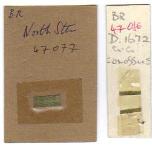
And finally, the fitting of those nameplates that started it all off, all those years ago
Locos completed May 2010
Back to TT modelling